Novelty Nine Patch
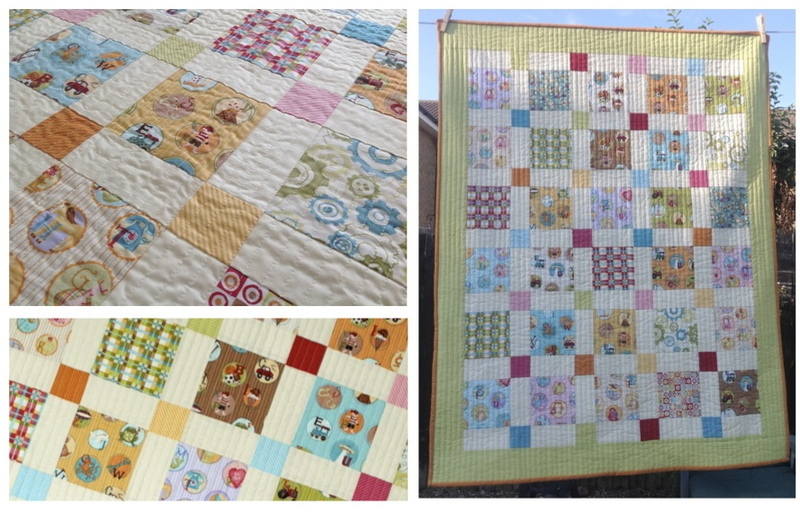
This charming cot quilt is based on the traditional nine-patch block - but with some clever cutting you can make it magically disappear to create sashing and cornerstones!
A few notes before we start:
• Read all instructions before you begin.
• WOF = width of fabric
• Seam allowances are ¼” unless otherwise stated.
• Finished quilt size is approx. 39” x 49”
• This free pattern has been designed to be followed on on screen on your tablet or PC, however, if you would prefer a printed version, click here to download a free PDF.
So for this project, you will need:
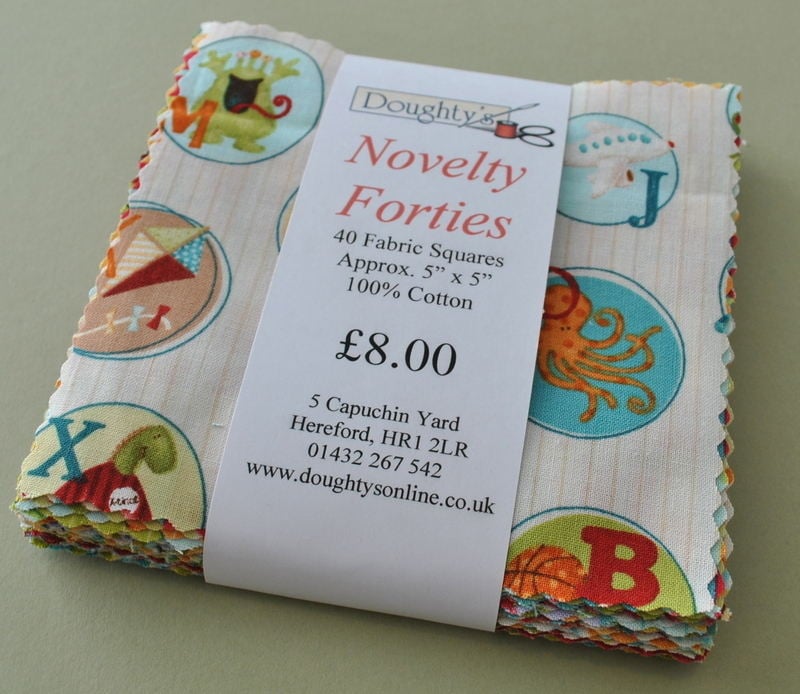 • One 40-piece charm pack (5 x 5” squares) – the charm pack I used contained 32 novelty prints and 8 blenders. If you don’t have blenders in your pack, you could delve into your stash, you will need eight 5” squares that co-ordinate with your novelties
• 60cm of a co-ordinating plain – cut into thirty-two 5”x 5” squares
• 50cm of a blender fabric for the border
• 35cm of another blender for the binding
• 1.40m of backing fabric (44” wide)
• Wadding 42” x 52”
• Matching thread for piecing
• Desirable thread for quilting – this could be a neutral colour that will blend into the fabrics, or a bright variegated colour that will be more prominent.
Preparing Your Nine-Patch Blocks
1) Take four novelty prints and lay them out at each corner. If the prints are directional, follow the arrows in the diagram. Then take one blender square and place in the middle, with four plain squares in the remaining gaps, making up a nine-patch square.
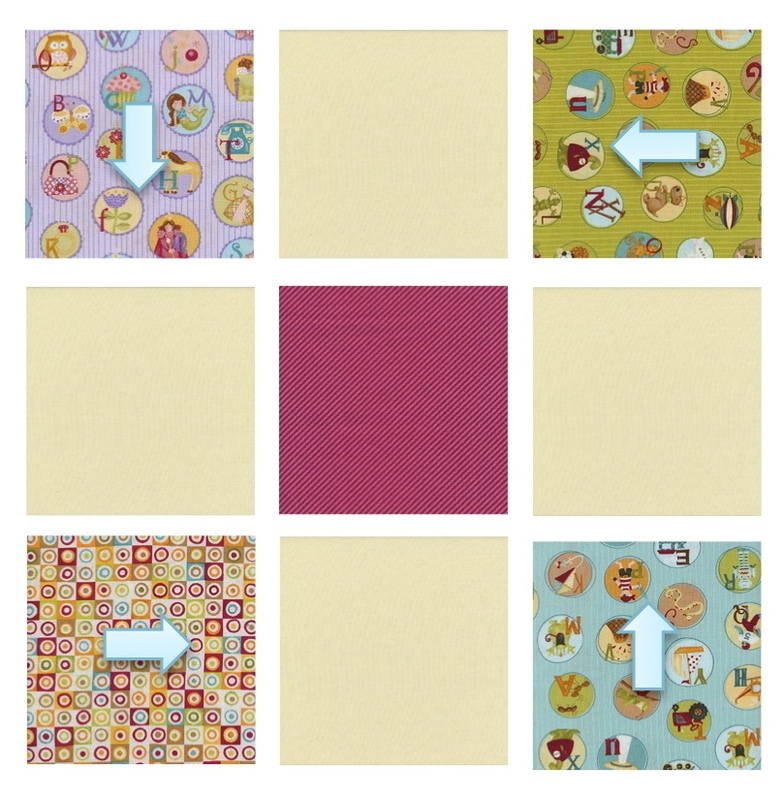 2) Sew each of the three rows together. On the first and third rows, press the seams towards the right, for the second row, press the seams towards the left.
3) Take the first and second rows and place them right sides together. As you have pressed the seams in opposite directions, you will find that they lock in together making it easy to match your seams. Sew these together.
4) Now sew the third row onto this unit in the same way, locking your seams to ensure they match. Remember, if you are using directional prints, it matters which way you sew your nine-patch together, so check your placement. Press your new seams towards the centre. You now have your first nine-patch block. For even more on building a nine-patch block, check out the instructions for Fox in the Nine Patch. Do the same with remaining squares, remembering to bear in mind the direction of the prints. You will get 8 nine-patch blocks in all. Press all seams towards the centre.
Cutting Your Nine-Patch Blocks
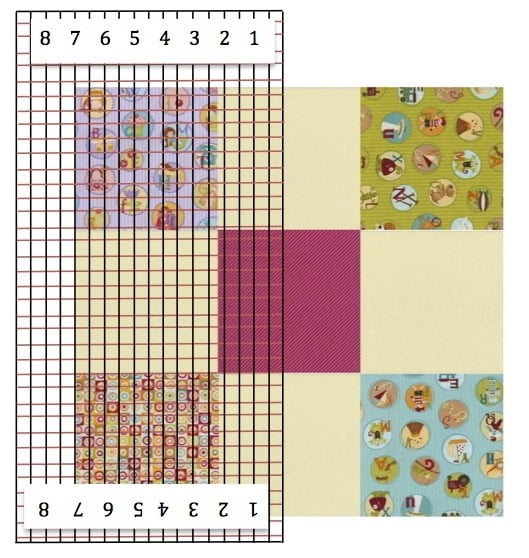
5) Now comes the cutting bit. Lay your first pressed nine-patch block onto your cutting mat. Your block should measure 14’’ x 14”, and the centre blender square should be 4½”. It is important that you cut this block exactly in half, so you need to find the half-way point of the centre square and cut here. Align the 2¼” mark on your ruler with the left edge of your centre square, ensuring your horizontal ruler marks also line up with your horizontal seams to ensure a straight cut. Cut your block in half using your rotary cutter. If your centre square is not exactly 4½”, measure it and find the half way point of its true measurement, then line this up down the left side of your centre square.
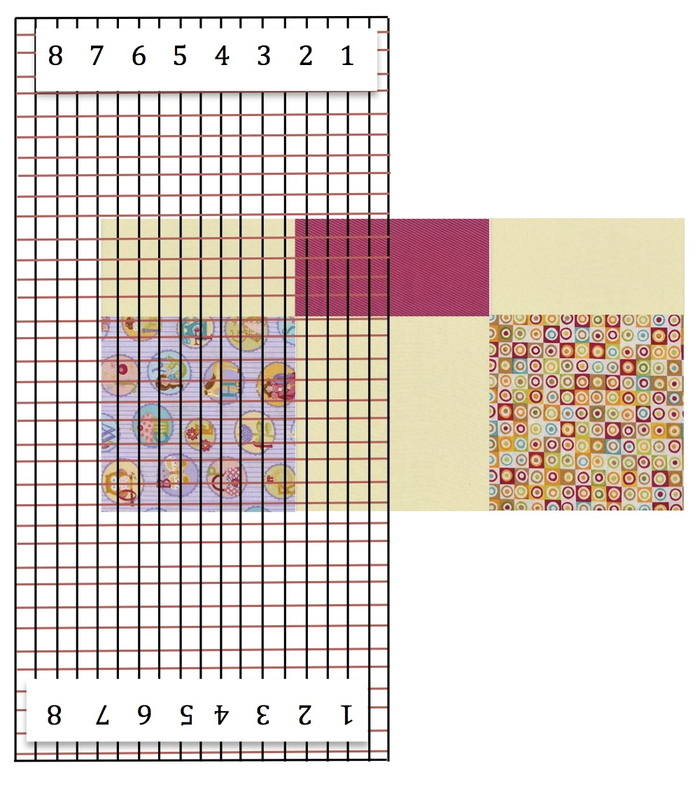
6) Take one of your halves, turn 90 degrees, replace your ruler, again aligning the 2¼” ruler mark down the left-hand edge of your centre square, and cut this piece exactly in half. Do this with all of your nine-patch blocks, you should end up with thirty-two 7” x 7” mini-blocks.
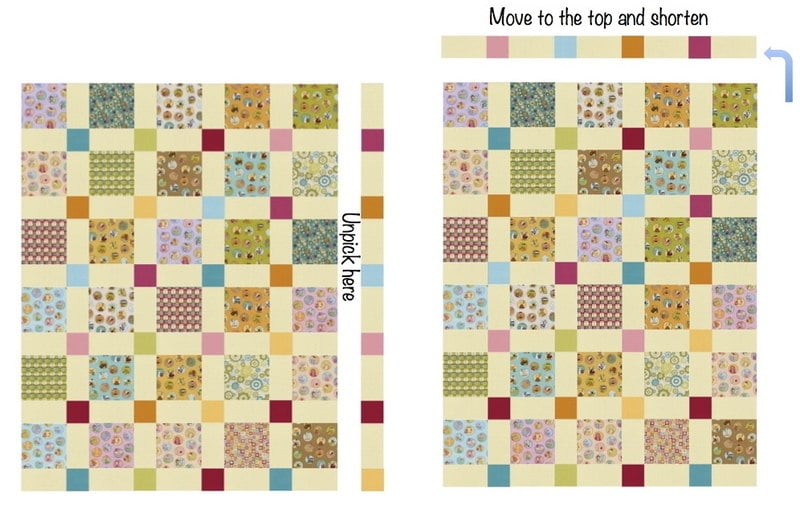
7) When planning the layout of your quilt, there is no exact pattern to follow, you just need to be random, making sure no two colours are next to each other. You need to have 5 blocks across, and 6 rows down. You will end up with 2 spare blocks. Don’t worry about the extra sashing and cornerstones on the right-hand side for now, these will be removed and added to the top later.
8) Sew each of your rows together. On rows 1, 3 & 5 press seams towards the right, on rows 2, 4 & 6 press seams towards the left.

9) Now sew all your rows together, making sure your seams lock into each other to help them to match up. Press your seams in one direction.
10) As you will see, you will have sashing and cornerstones on the bottom and right-hand side, but not the top or the left side. If you are happy with this, then fine, go ahead and attach your borders. However, if like me, you prefer symmetry, you can carefully unpick your right-hand edge, and then sew it onto your top edge and voila, you have symmetry!
Attaching your border
11) Measure your quilt top, it should be 31” x 41½”. When measuring your quilt top to fit borders, it’s best if you measure down the centre of your quilt – lengthwise, then widthwise – rather than the edges as these may be stretched and not give you an accurate measurement. Cut two 4½” x 41½” strips from your blender border fabric. If the measurements of your quilt top differ slightly, don’t worry, just cut your border strips to fit your true measurements.
Sew these onto the two sides of your quilt top. When attaching borders, find the halfway point of the border strip and pin this first to the halfway edge of your quilt top, then carry on pinning the rest. Press seams outwards. Now measure your new width, it should be 39" - cut two 4½” x 39” border strips (or to fit your quilt if different) and sew these onto the top and bottom, again press seams outwards.
12) Press your finished quilt from the front.
‘Quilt as Desired’
13) Those dreaded words! Quilting really isn’t as scary as you may think, you just need to take a deep breath, and maybe a glass of wine… and you’ll be quilting in no time.
14) Firstly, you need to layer your quilt sandwich. Lay out your backing fabric facedown, onto a flat surface, a clean floor is ideal. Secure with a few pieces of masking tap to ensure it stays flat. Now lay your wadding on top, pushing it out from the centre to get rid of any creases. Then lay your ironed quilt top onto this, again pressing out from the centre to push out those creases. For more on basting your quilt sandwich, see my Beginner's Quilt - the quilting.
15) It really is up to you how to quilt your top. You could go for some stitch-in-the-ditch down all the seams, or you could try some wavy-line quilting across the whole top. In mine, I wanted to try straight-line quilting using my walking foot. Using the outside edge of the walking foot against the the centre seam, I started at the centre point of the top edge and stitched straight down the quilt. When I got to the bottom, I broke thread and pulled the quilt back through the machine. Then using my previous stitching line as a guide for the edge of my foot again, I stitched a second line down. As my foot is an inch wide, these parallel lines come out as ½” apart. It took a while, but I love the effect!
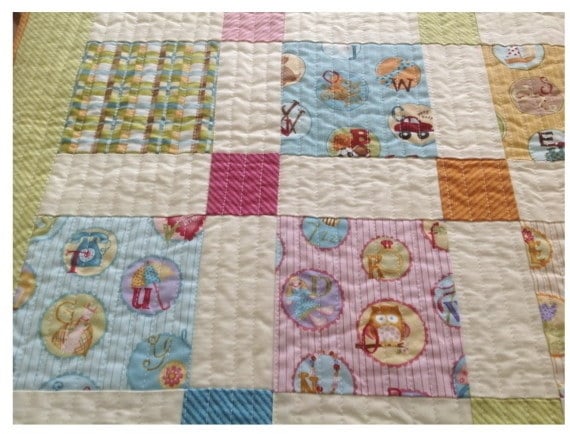
However, you could just ‘stitch-in-the-ditch’ up and down your seams, or you could quilt lines the width of your walking foot away from each seam. This is a great quick technique – you don’t have to concentrate on getting those stitches right in the ditch, which can get messy if you have a couple of dodgy places where seams don’t quite meet. All you have to do is keep the edge of your walking foot running along the seam, do this on all your vertical seams, then your horizontal.
Of course, if you’re feeling adventurous, you could have a go at free-motion quilting, now that is fun! Whatever you do, make sure you enjoy it, else what’s the point!
16). When you have finished all your quilting, trim all your edges neatly. Now you need to attach the binding. From your other blender fabric, cut five 2½” strips across the width of the fabric, sew these into one long strip using 45degree angles and attach to quilt. For much more on sewing on your binding, check out Beginner's Quilt - the binding for some easy-to-follow pics. Once this is done, sew on a label with your name and year, and you've completed your quilt, congratulations!