Beginner's Quilt - The Quilting
This is the second part of my Beginner's Quilt series, if you would like to start from the beginning click here.
"Quilt as desired" ... A term seen in many quilt patterns certain to raise fear in any new quilter. But, as I and many others have learnt over the years, the quilting bit really isn't as scary as you might think. If you start small and simple and then build up to that king size free motion beast, you will find quilting an enjoyable experience.
There are a few bits you need before we get started;
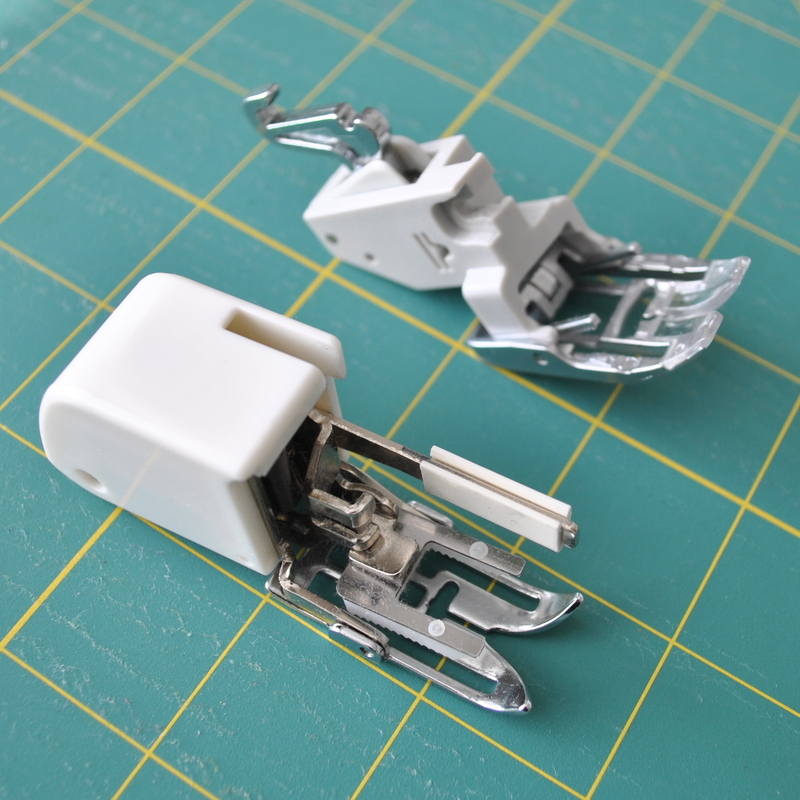 • A walking foot for your sewing machine - this is not one of the standard feet that come with most sewing machines so you may have to buy this seperately. However, it is a must for quilting. This foot has its own set of feed dogs which work in conjunction with the feed dogs on your machine to help push the fabric through evenly, and as we are working with three layers here, we need all the help we can get. This foot also helps with slippery fabrics such as satin.
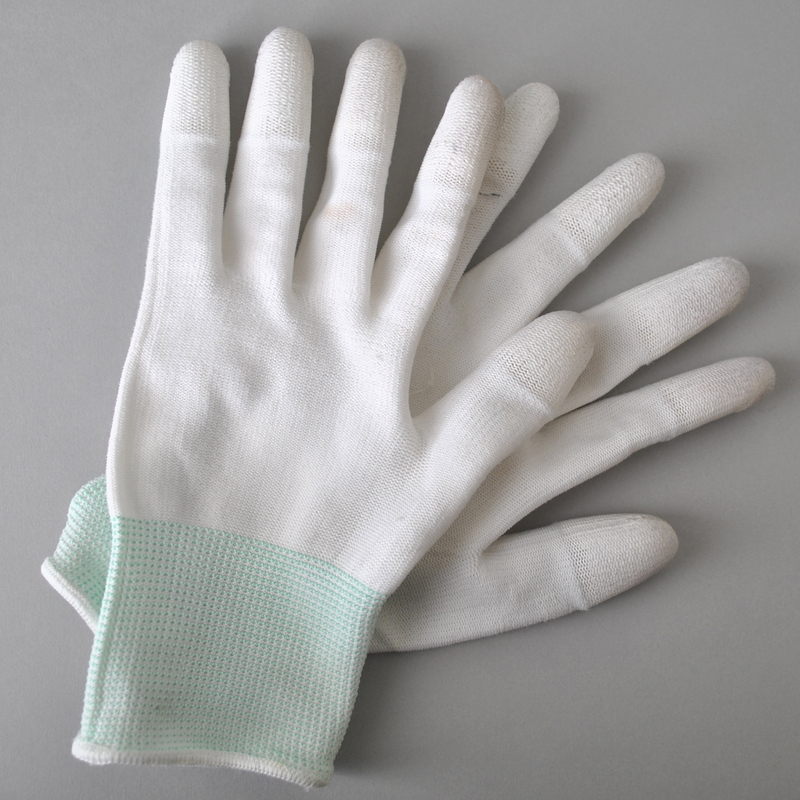 • Quilter's gloves - these are cotton gloves with rubber finger tips - and can really be a life saver - the rubber gives you more of a grip on the fabric and lessens the pressure on your shoulders. A real must for free-motion quilting, but they're also very useful for keeping your quilt sandwich stable when sewing.
Another useful piece of equipment is an extension table for your sewing machine. This gives you a larger level working space around your foot so your quilt top won't fall to the sides and get distorted. However, as this Beginner's Quilt is quite a manageable size, you shouldn't have too many problems if you don't have a table as yet.
What you will need is a good amount of table space to the left of the machine which will hold the other half of your quilt while you sew. If I'm working on a large quilt, I often put my ironing board to the side of me so I can rest the quilt on there, rather than it falling on the floor and pulling on the quilt in the machine.
1) First we need to make a quilt sandwich – backing, wadding and quilt top. As you sew through your quilt sandwich, your backing and wadding are pulled in slightly, which is why you need these two pieces to be slightly larger than your quilt top. An extra 2” all the way round is ideal.
So for the Beginner's Quilt, you will need 1.15m (45”) of backing fabric – you may notice by now that most quilting fabrics are only 44” wide at the most. Now, you could go and buy a wider fabric, many dressmaking cottons come in 54” or 60” widths, you could opt for a 60” calico, or even an extra wide quilt backing which tend to come in 108” widths.
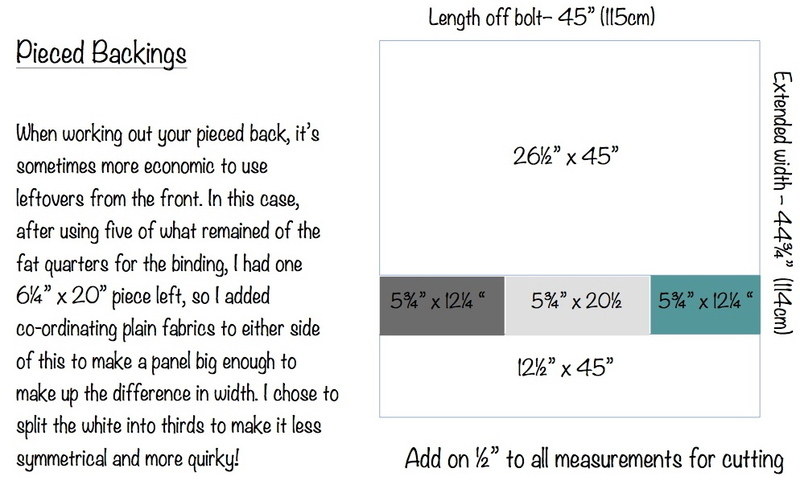
Or you could do as I do, and piece a backing. In the Beginner's Quilt, I have used the same white fabric I used for the border which was actually only 42” wide, and added a 6” panel of other fabrics to make up the width. Here is a little plan of how I worked out the piecing for the back…
2) Once you have pressed both the backing and your quilt top, and cut the wadding to size, again 45” x 45”, you need to prepare your quilt sandwich. For more on the different types of waddings, click here - in this quilt, I used my favourite, an 80/20 blend.
To help us try and get everything centred on top of each other, fold the backing in half lengthwise and place a pin at both midway points on the borders, then fold widthwise and place two pins in the other borders. Do the same for the quilt top
3) Go to that clean flat space again, and lay your backing, face down, pressing any creases out from the centre. Now lay your wadding on top of this, again pressing out the creases. And finally, lay the quilt top, face up on top of this, use your pins to line up the top with the backing on all sides.
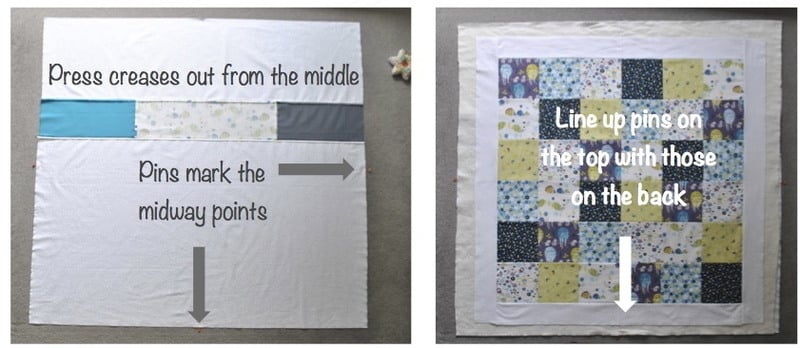
4) Now to baste – see Basting for more on the different methods, for this quilt we’re going to use my favourite, and in my opinion, the easiest method - curved safety pins. When basting the sandwich together, some quilters prefer to tape the backing to the floor to stop it moving. However, I have found that if you are on carpet, the friction tends to keep the fabric in place. Try out different ways for yourself, and I’m sure you’ll find your favourite. This is just my method that has always worked for me.
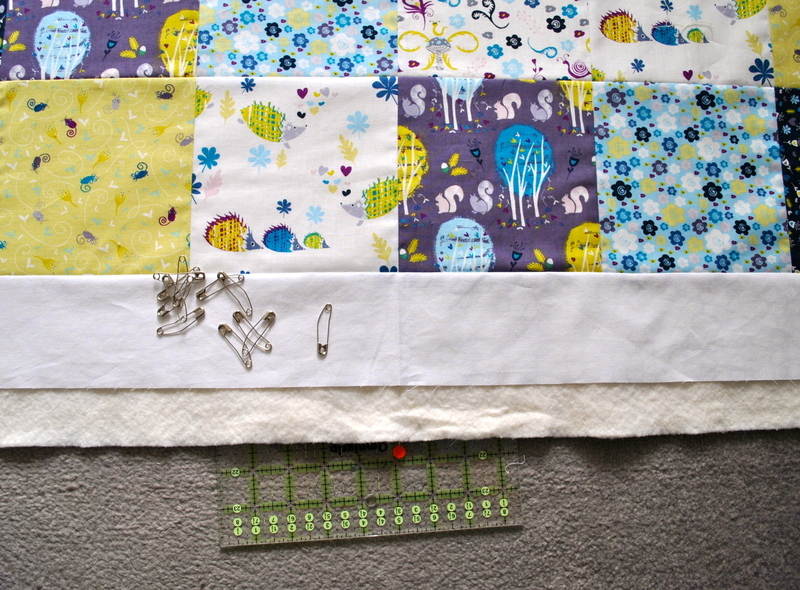
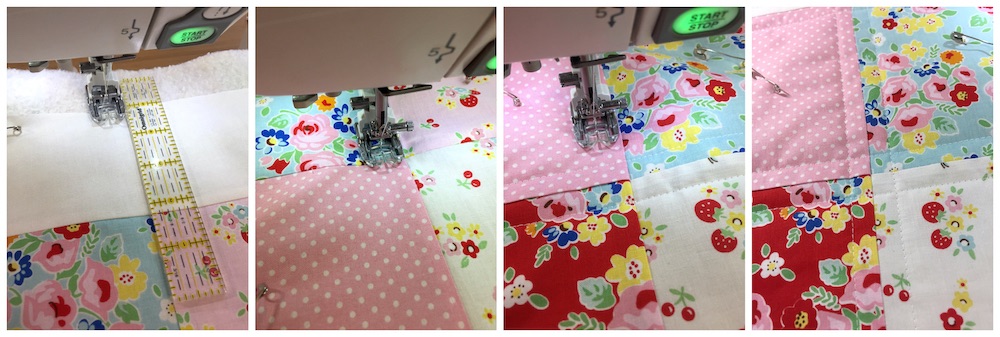
Once I have my quilt sandwich all nice and flat, I start from the middle of the quilt, and slide my quilter’s ruler underneath, careful so as not to distort the fabrics. This will work as a base for the safety pins to hit against and then to come back up without catching the carpet.
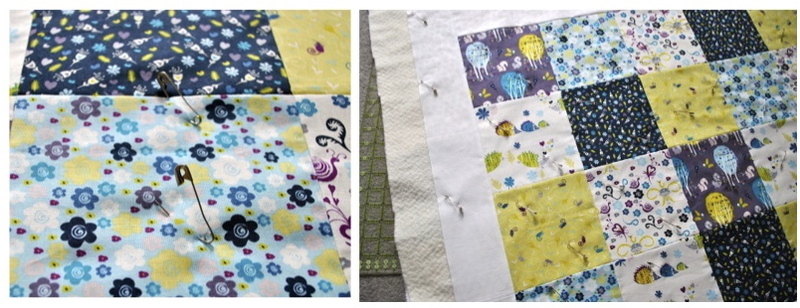
Place a couple of pins in the centre square, then working towards you insert pins about 4" apart to the edge of the quilt. I pin right to the edge of the border to make sure I don’t have the back flapping around to get caught in any quilting. Then move the ruler along to the next row of squares and repeat. You’ll have to move yourself around your quilt top as you baste, so make sure you have enough room.
Now to quilt… there are so many ways you could quilt this top, vertical lines ¼” apart are very trendy at the moment, as are wavy lines, or you could sew diagonally through each square, you could echo quilt each square – sewing ¼” inside of each one, and there’s always free-motion quilting. I have added a section further down on how to echo quilt your seam lines creating a grid-like effect. However, below is an easy, quick and very useful method to learn called stitch-in-the-ditch.
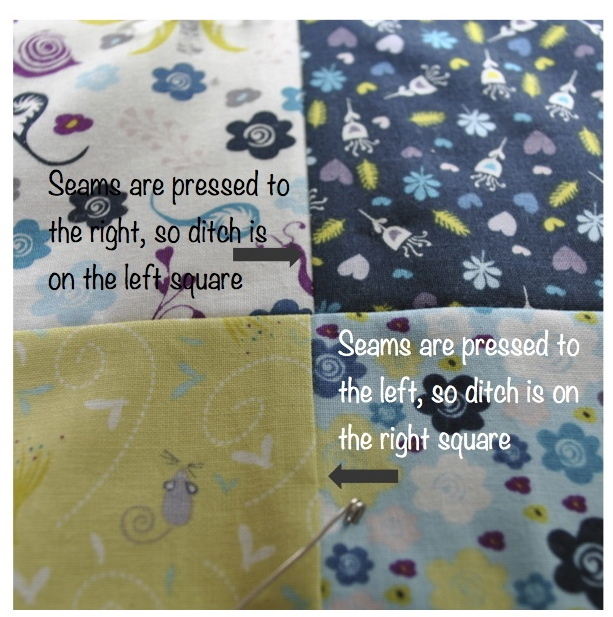
You will see that depending on which way you pressed your seams, there is a little bump under the square where the seams lie, making it slightly higher than its neighbour. This difference in levels creates a so-called ditch on the lower square, and this is where you want to sew. Once you have stitched in this ditch, the bump will lay over the ditch hiding your stitches.
5) Take your basted quilt over to your sewing machine. Attach your walking foot and if you have an extension table, amazing, if not, don’t worry. You are going to stitch vertical lines starting from the top middle of the quilt, unfolding towards the right as you move onto the next seam. This way you will only ever have half of your quilt rolled up in the machine at one time. So roll up the right hand side of your quilt, so that the middle vertical row can sit under the needle.
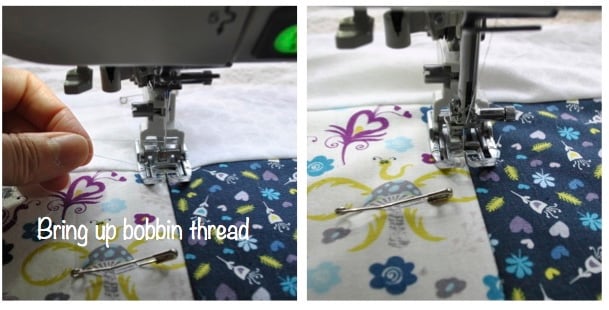
6) Insert your needle at the top of the middle seam of the quilt, and bring up your bobbing thread to the top as you would when you have just inserted your bobbin – (hold your top thread in your left hand, and turn the wheel so the needle goes down then comes back up with the bobbin thread). Some sewing machines have a needle down button – amazing! Just press this twice. Tuck both your threads under the foot and to the back out of the way.
As you will notice, there is a lot of quilt to deal with under and around the machine so you need to make sure that the quilt is not going to get pulled in any direction. For instance, don’t let it drop off the end of the table to your side or at the back of the machine. And don’t let it get caught up in itself in your lap. Sew slowly, stopping regularly to rearrange the quilt – pull it up out of your lap and bunch it up at the back of the machine as you sew. It’s good to have a kind of puddle of quilt around your machine foot, using both your hands spread out to flatten it as it gets near the needle.
There are a couple of ways to start off your quilting. You can just start sewing with your chosen stitch length, but this will mean you will have to go back and hand sew your thread ends into the quilt to secure them. Or, you could do as I do, and lock your threads in. Now some machines actually have a locking button, again amazing! However, if yours doesn't, don't worry, you just need to take your stitch length down to very tiny, say 0.5, these tiny stitches will lock your threads in and you'll only need to snip them off at the end - simple!
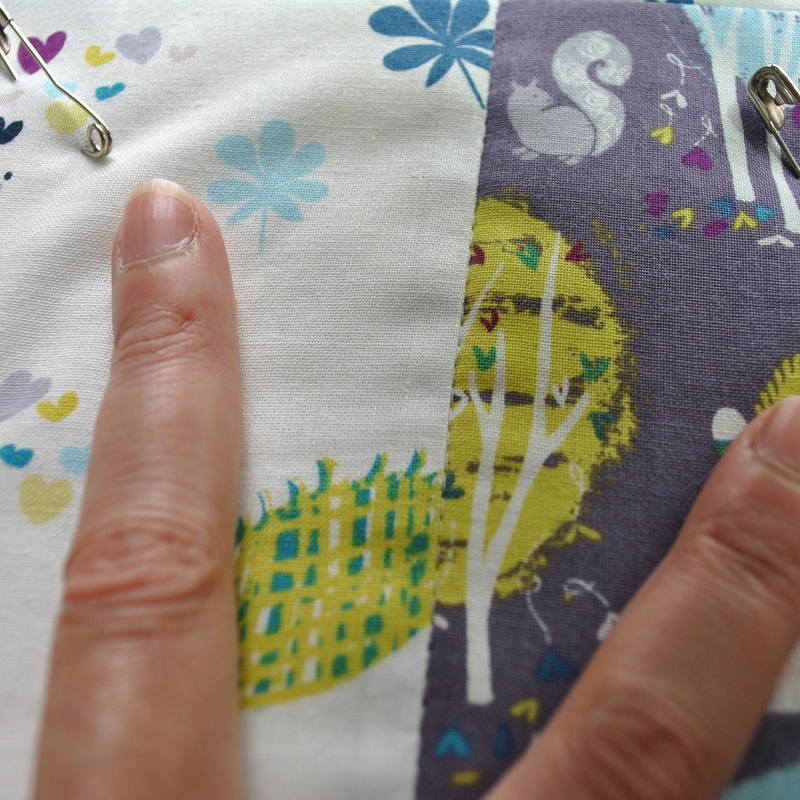 7) So, lock your threads in, then change the stitch length to a little longer than normal say, 3.5. Not only will the sewing be quicker, but as these stitches will be hidden, a longer stitch is fine. Start slowly and sew down the ditch of the first square. If you gently pull the seams apart as you go you will be able to get right into the ditch - quilting gloves are a great help here as they grip the fabric lessening the strain on your hands.
When you get to the next square, you may find that the ditch has changed sides – this is because you have alternated the side you pressed your seams. All you do is change sides so the needle is still in the ditch, but this time on the opposite square than before. Continue to sew down the seam, checking for the ditch as you come to each square, and removing pins that get in the way as you go. I tend to leave in the safety pins at the edges of the border to keep the backing out of the way.
8) When you get to the end of your first row where the last square hits the border, for your last stitch take your stitch length down to tiny (0.5) again and sew a few stitches to lock your thread. Break thread and snip off your ends on the quilt – I find it useful to snip off thread ends as I go so I don’t have loads to do at the end.
9) Now slide your quilt down through the machine back onto your lap, I find that if I go up the seam I’ve just sewn, there’ll be no pins in the way. When you get to the top, snip the threads of the seam you just did, unroll your quilt moving towards the right and place your next seam under the machine, bring up the bobbin thread and off you go again. Carry on to the right edge of the quilt, finishing with the border seam.
10) You now need to quilt the vertical seams on the other half of the quilt, so turn your quilt 180 degrees, start with the seam next to your first one, and sew as you did before. You sew the horizontal seams in exactly the same way, turn your quilt 90 degrees, roll up the right half, and place the top middle seam under the machine and sew. Turn again to sew the last half, and your quilting is done! Hopefully that wasn’t too painful!
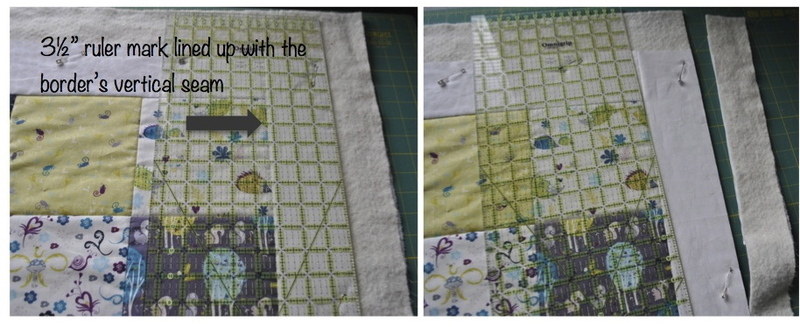
11) We’re nearly there, just the binding to do now. So, lay you quilted top onto your cutting mat and use your ruler and rotary cutter to trim all four sides neatly. Again, I tend to leave my curved safety pins in the borders at this stage to keep the backing from folding back onto itself, though please be very careful that you don’t hit a pin with your rotary blade. To try and get your quilt as square as possible, line up the 3¼” mark on your ruler with the vertical of the border, this will give you a straight edge. If this is slightly off don’t worry, you can reduce the size of your border, just bring the ruler in to say the 3” mark – just make sure that there is no wadding showing once you have trimmed.
We're nearly there, now move onto the third and final part of this series, The Binding.
Quilting Alternative: If Stitch-in-the-ditch isn't for you, why not just echo-quilt your horizontal and vertical seam lines, creating a grid-like effect over the whole quilt. I like this technique as you don't have to concentrate on getting your stitching exactly in a ditch, if you go a little wonky, you really won't notice! You can also quilt across your borders which means you can start and finish your quilting off the quilt into the wadding - no need to lock threads or sew your ends in, so much easier!
Starting at the top of the centre vertical seam line of your quilt, place a ruler against the seam so it carries on up into the border. Use this as a guide against the right edge of your walking foot until you can use the actual seam. Using a larger stitch size (3.5) sew down the length of the quilt keeping the edge of your walking foot against that seam line. When you come to the bottom border, use the ruler again to help you sew straight down and off into the wadding, break thread.
Pull the quilt back through the machine and repeat on the right side of the seam creating two parrallel lines of quilting. Repeat this on all the vertical seams. Then turn the quilt 90 degrees so you can quilt the horizontal seams, as you can see below these straight lines create a grid and a cute mini square where they cross at the seams. If you find that the quilt bunches up at these points when you are sewing your second set of lines, flatten out the quilt top around the foot by gently pulling the quilt to manipulate it to lay flat - this is where quilting gloves really help.
